To receive purchased items and put them on stock, do the following:
- Open document view
- Click "Add" button to select document type
- From "Expenses" category, select "100 - Purchase" and click "OK"

New document form will open in a new tab, allowing you to add items to a document.
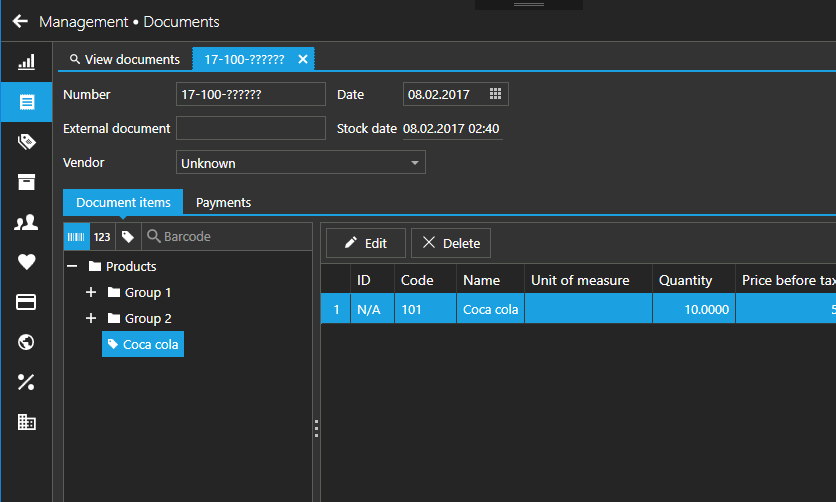
Document form
Document contains document header, document items tab and payments tab.

Document header contains the following fields:
- Number
Read-only field, number is automatically assigned - External document
Referenced document number, e.g. supplier's invoice number - Vendor
Supplier, selected from existing clients - Date
Document date - Stock date
Date and time when items where actually added on stock
Adding items to document
From the left side, find a product you wish to add to document and do one of the following:
- Select product and click ENTER key
- Drag & drop product to a document
- Double click on product
Searching products
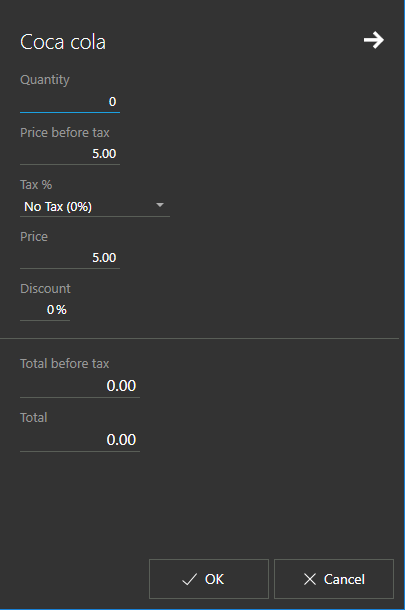
You can search products by code (SKU), barcode or product name.Once product is selected, a flyout dialog will open, allowing you to enter document item properties.

Enter quantity and price details and click "OK" button to add item to document.
Payments
If required, add any payment methods used to pay for this transaction.
Once you have added all items to document, click "Save" to save changes.

