- Installation language
- Welcome page
- License agreement
- Select destination location
- Select components
- Select Start menu folder
- Select additional tasks
- Ready to install
- Installation progress
- Finish
In this article, we will guide you through Aronium installation.
Installation, once started, usually takes no more than 15-20 seconds, depending on selected components.
Start the installation you have previously downloaded and follow the steps below.
Installation language
Select preferred language that will be used during installation.

Welcome page
First screen you see after language selection is an introduction screen with application version and basic instructions. No action is required, click "Next" to continue.

License agreement
You must accept our Terms of Use in order to install and use Aronium.
Read the license agreement carefully and, if you agree with it, check the "I accept the agreement" check box. Otherwise, if you do not agree with our Terms of Use, you cannot install or use Aronium and you must abort the installation immediately.
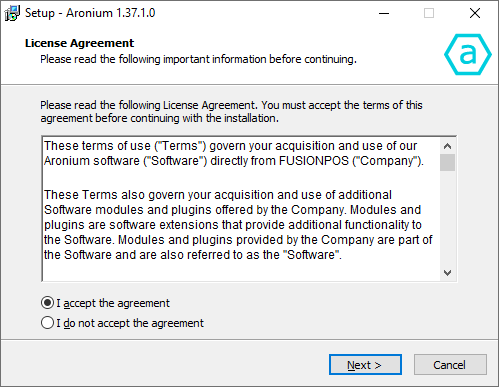
You can read the latest terms of use at www.aronium.com/en/terms-of-use.
Select destination location
In this screen you can select location where Aronium will be installed. Default directory is "C:\Program Files\Aronium".
We recommend leaving directory location as set by default.
If you still wish to change target directory, click "Browse" button and select desired location.
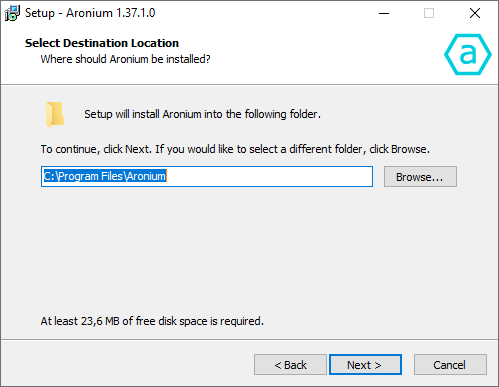
Click "Next" to continue.
Select components
Select which components you wish to use. Please remember that this screen may be slightly different depending on what Aronium version you are installing.
You may also select additional plugins you wish to install or try.

Plugin selection
You may choose not to install any plugin. If you wish to install them later, you can download them anytime from our download page.
Please remember that some of the optional plugins offered in this screen may require a license, so you may need to create an account and activate the trial to use them. If you decide to install a paid plugin, you can find instructions on how to activate a trial here.
Once you have selected which components you wish to install, click "Next" to continue.
Select Start menu folder
This screen gives you the option to select whether application shortcuts will be created in Start Menu. We recommend that you create Start Menu shortcuts, as set by default.
If you, for any reason, do not want to place shortcuts on Start Menu, check "Don't create a start menu folder" option at the bottom of this screen.
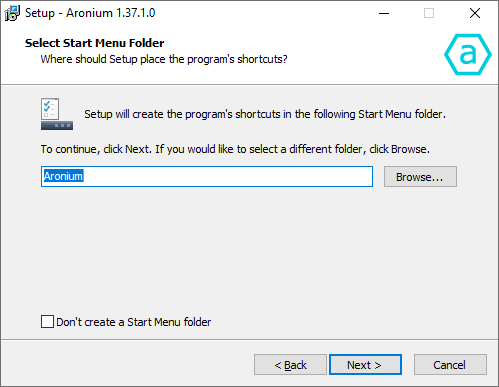
Click "Next" to continue.
Select additional tasks
This screen gives you the ability to create desktop shortcut. If you do not want to create desktop shortcut, clear the "Create a desktop shortcut" option.
We recommend that you leave this option checked, for easier access to application after installation is completed.
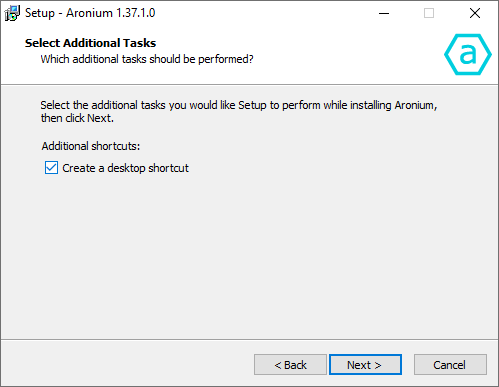
Click "Next" to continue.
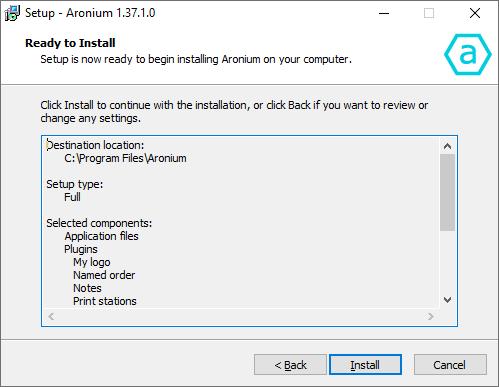
Ready to install
This step will display the summary of all previously selected options.
Click "Install" to start the installation.
Installation progress
On next screen, you will be presented with installation progress.
Wait until setup is completed, it shouldn't take more then 10-15 seconds.

Finish
Once setup has finished copying all required files, you will see the screen notifying you of successful install.
You can click "Finish" to close installer.

If you selected the option to create a desktop icon, you will see the Aronium shortcut placed on your desktop.

