Aronium comes with two layouts, "Standard" and "Visual". You can change layout in the application settings.
Standard Layout
Standard layout consist of items list on the left, product search field, quick payment and action buttons on the right side.
Items list
Items list displays products added to the current order, displaying name, quantity, price and total amount.
Icon in front of the product name is used to determine an item status:
- Added (white plus sign)
- Confirmed (green lock)
- Deleted / voided (red minus sign)
Search options
Use search options to change the way how you search for products.
Blue dot on top of a search option indicates the selected one.
You can choose between the following search options:
All fields (wildcard)
If this option is selected, products will be searched by all fields: name, code (SKU) and barcode.
Please remember that search results will display a product if code (SKU), barcode or name contains any part of the text.
Barcode
If you are using barcode to scan your products codes, all you need to do is to ensure that the keyboard cursor is placed in the search box (as it is by default). If search box is not focused, simply hit "ESC" on your keyboard, and Aronium will focus the search box automatically.
Scanning the barcode will automatically add product to the list, if found, otherwise, error message will be displayed.
Code
If you are using custom codes to search for the items, enter product code in the search box and hit Enter. If item with specified code is found, it is automatically added to the list, otherwise, error message is displayed.
Name
If you prefer searching your products via product name, just type the starting letters in the search box (drop-down) and select.
Alternatively, you can expand drop down list to visualize your products and find them by name.
Action buttons & payment types
Action buttons
Below search box, you can see the buttons for the most used actions, like:
-
Delete
Void selected item in current order.
-
Search
Opens advanced product search screen. -
Quantity
Use this button to set quantity for the next product that will be added to current order, or change the quantity of the selected one. -
New sale
Creates new, empty order, storing current one safely until new one is closed.
You can have as many open orders as you need. If there is more then one open order at the same time, order selection screen will be displayed, otherwise, current order is automatically selected and loaded.
Quick payment buttons
Quick payment buttons are placed below action buttons.
Default payment can be accessed using "F12" key.
Hitting any of quick payment buttons will automatically close current order and create invoice with selected payment type.
Default payment type
Default payment type can be set in Management > Payment types, as described here.
Menu buttons
Additional buttons placed in lower right corner gives you access to advanced order options and application menu.
-
Discount
Opens a discount dialog where you can apply discount to the current order (cart discount) or to selected item -
Comment
Adds a comment to selected and prints it in the kitchen ticket -
Cash drawer
Opens cash drawer, if configured -
Order (F9)
Confirms current order without closing it. if print options are set, it will print order to selected Escape POS printer.
Red circle (badge) indicates number of new items added to the current order. -
Refund
Creates a refund from items added to the current order -
Payment (F10)
Opens advanced payment form.
You can use payment form to select customer, add discounts, override taxes and select payment types for selected order. -
Lock
Locks the order and prints proforma to specified printer, if any.
Once order is locked, it cannot be modified until unlocked. -
Transfer (split order)
Split current order to multiple orders, transferring items to another order or user.
You are able to select items and quantity that will be transferred to selected order or user. -
Void order
Voids (delete) complete order.
If items in current order are not confirmed, they will be deleted, otherwise, items with negative quantities will be added in order to void them. -
Menu [•••]
Opens a Main menu, giving you access to additional application options.
Visual Layout
Visual layout consists of top action buttons, items list and a product grid.
Top buttons bar
Top buttons bar contains the following actions:
-
Lock
Saves and locks current order.
Receipt is printed on ESC POS printer, if set in application settings. -
Transfer
Splits current order.
User has the ability to move items to another of new order, or to another user. -
Discount
Opens a discount dialog where you can apply discount to the current order (cart discount) or to selected item. -
Comment
Adds additional comment to selected item that can be printed to kitchen printer, if any. -
New sale
Creates new, empty order, storing current one safely until new one is closed.
You can have as many open orders as you need. If there is more then one open order at the same time, order selection screen will be displayed, otherwise, current order is automatically selected and loaded. -
F9 - Save sale
Creates sub-order. -
F10 - Payment
Opens payment form. -
F12 - [ Default payment type ]
Uses default payment type for quick sales. -
Menu
Opens Main menu with access to additional application options and modules. -
Void order
Deletes (voids) entire order. -
Lock
Locks the order and prints proforma to specified printer, if any.
Once order is locked, it cannot be modified until unlocked. -
Repeat round
Repeats last, or selected round.
If no item is selected, items added in last round will be re-added to current order, otherwise, items from selected order will be added to current order.
Items grid
Items grid is presenting products and product groups.
Simple tapping on a product group will show its items and sub-groups.
User can always go back to previous group by simply tapping on back arrow in top-left corner of the items grid.
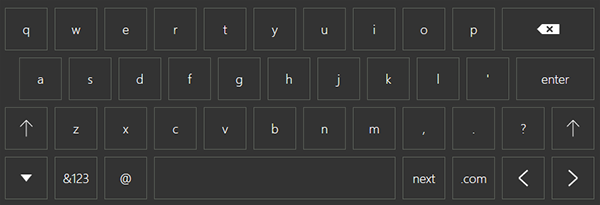
Virtual keyboard
If you are using visual layout, virtual keyboard should be enabled. You can always enable or disable virtual keyboard in application settings.
If enabled, virtual keyboard will automatically pop-up from the bottom of the screen when you enter a text field.

To access numbers and symbols, click on toggle numeric button.

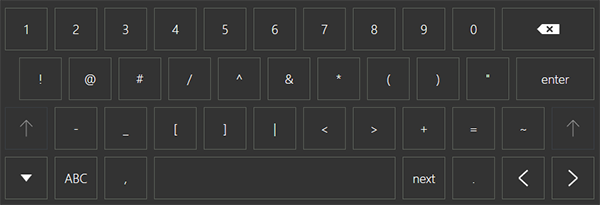
Clicking on "&123" button change the keyboard to the following layout:

Button text will be changed to "ABC" indicating that clicking again on it will bring back standard keyboard.

You can always hide virtual keyboard by clicking down arrow button in bottom-left corner. You can always bring the keyboard back by clicking any text field.

Tip
If you are using Aronium virtual keyboard on a screen with small resolution (e.g. 1024 x 768), it may happen that the keyboard will occupy and hide a part of your screen.In case your desired content is hidden you can always hide the keyboard using the above mentioned button. Virtual keyboard will automatically pop-up again once any input field is focused.
If you wish to toggle upper case letters or enable CAPS LOCK, use "shift" button.

To move to next field on screen (like TAB button on standard keyboard), use the "Next" button.

Main menu
Main menu gives the user access to additional modules and application options.
Basic Main menu options
Management
Access application management to make changes to company details, products, customers, tax rates, payment types and other business related entities.
View sales history
View closed sales and print invoices.
You can find more info about sales history here.
View open sales
Displays all open sales (orders).
Cash in/out
Entering the cash in/out process.
Read more about cash in/out process here.
Credit Payments
Entering the credit payment settling process
Read more about credit payment settling process here.
Closing Day
Enter closing day process.
User info
Access user details and the ability to change user details and password.
Sign Out
Sign out currently logged in user.
Actions
At the bottom of the Main menu, you can find additional application actions.
These buttons represent the followings:
- Access application settings,
- Enter full screen mode and
- Shut down / restart application
